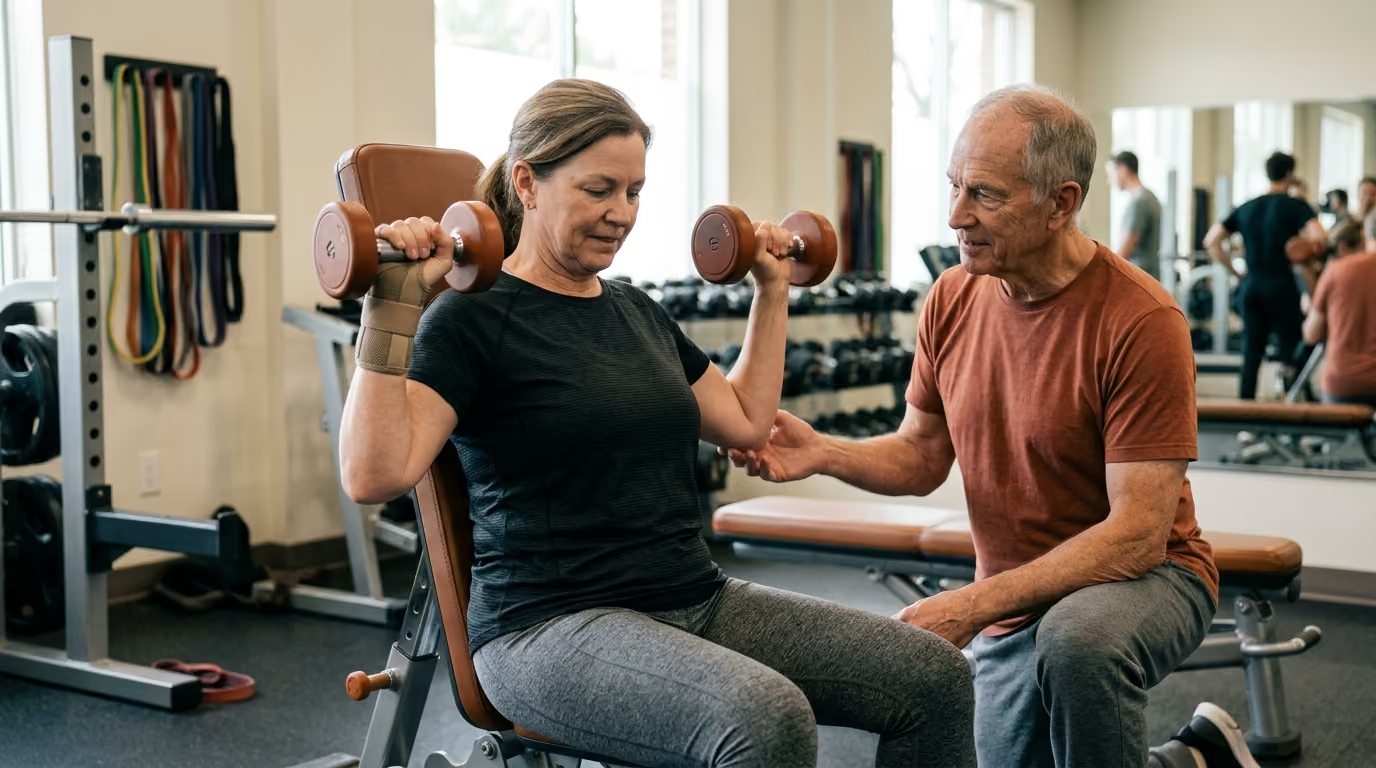

Stronger muscles and pain-free movement are fully achievable through modified resistance training routines designed specifically for sensitive or stiff joints.





You wake up, step out of bed, and immediately feel a familiar ache in your knees. Perhaps your lower back stiffens after twenty minutes of sitting, or your shoulder pinches whenever you reach for an overhead cupboard. When everyday movements feel uncomfortable, the thought of lifting heavy weights in a gym can feel intimidating or even counterproductive.
Joint discomfort, reduced mobility, and balance concerns do not mean you have to avoid resistance training. When you modify movement patterns, adjust your range of motion, and manage overall training volume, resistance exercise is safe and therapeutic for sensitive joints. This guide explains how to adapt your strength routine around your current capacity while honoring appropriate medical boundaries.
Understanding how to adjust your exercise selection allows you to build muscle, protect your joints, and maintain your independence for decades to come. In our experience, people often believe that an aching joint requires absolute rest. When our team looks at the clinical research, we see that appropriate, graded mechanical loading is precisely what helps cartilage, tendons, and surrounding muscles stay resilient.
To understand why exercise helps sensitive joints, we have to examine how joint tissues respond to mechanical stress. Articular cartilage does not have a direct blood supply. It relies on a process called fluid convection to receive nutrients and remove cellular waste products.
When you compress and decompress a joint through controlled movement, synovial fluid flows through the joint space. This fluid delivers essential nutrients to the chondrocytes, which are the specialized cells responsible for maintaining cartilage structure. Complete joint immobilization starves these tissues of dynamic fluid exchange, which can lead to accelerated stiffness and tissue weakness.
Beyond the cartilage itself, skeletal muscle acts as an active shock absorber for the entire skeletal system. When a muscle across a joint contracts, it absorbs kinetic energy and stabilizes the articulating bones. If the surrounding muscles are weak or fatigue rapidly, a greater proportion of joint reaction forces is transferred directly to passive structures like ligaments, menisci, and subchondral bone.
Mechanical loading also triggers a cellular process known as mechanotransduction. When muscle fibers, tendons, and connective tissues experience controlled mechanical tension, cell surface receptors convert those physical forces into biochemical signals. These signals stimulate collagen synthesis, enhance neuromuscular recruitment, and improve the structural integrity of the surrounding muscle-tendon unit.
Regular progressive resistance training also alters central nervous system sensitivity. Chronic joint discomfort often involves an oversensitized nervous system that interprets routine sensory input as a threat. Controlled, non-threatening resistance training helps recalibrate these neural pathways, reducing perceived discomfort while restoring movement confidence.
The scientific evidence supporting strength training for individuals with joint limitations is robust and consistent across major medical disciplines. Systematic reviews and clinical practice guidelines repeatedly demonstrate that resistance training reduces joint pain, improves physical function, and enhances quality of life.
For knee osteoarthritis, clinical research is particularly strong. A 2024 systematic review and meta-analysis of 27 studies involving 1,712 participants confirmed that resistance training produces statistically significant improvements in pain, muscular strength, and overall physical function. Similarly, a 2023 systematic review of 39 clinical trials found that structured exercise interventions consistently outperformed sedentary control conditions in reducing stiffness and improving functional mobility.
The evidence for chronic, non-specific low-back pain is equally compelling. Major clinical guidelines, including recommendations from the National Institute for Health and Care Excellence, recommend clinician-directed structured exercise as a primary management strategy. Clinical guideline summaries indicate that strength training, motor-control exercises, and structured walking all produce meaningful reductions in disability and pain.
Research regarding shoulder sensitivity and rotator-cuff-related pain also supports active exercise therapy. A 2025 systematic review of exercise therapy for rotator-cuff tendinopathy demonstrated notable improvements in pain and disability scores. While the optimal exercise selection remains individualized, progressive loading clearly outperforms passive rest or non-targeted movement.
Importantly, the latest meta-regressions reveal that more exercise volume does not automatically produce better pain relief. A 2025 systematic review with meta-regression found no direct relationship between total prescribed resistance-exercise dosage and changes in knee osteoarthritis pain. Trainees do not need extreme training volumes to achieve substantial metabolic and functional benefits; a concise menu of well-tolerated exercises performed consistently delivers the required therapeutic stimulus.
To train safely with joint limitations, you must establish a clear method for monitoring your body's response to exercise. A reliable assessment framework distinguishes between normal, safe training sensations and symptoms that require modification.
Irritability describes how easily a joint becomes symptomatic, how severe those symptoms become, and how long they take to return to baseline. Categorizing your current joint status helps you choose appropriate starting points for your program:
If a joint presents with high irritability, your primary focus should be calming the joint down using supported, low-load movements and shorter ranges of motion. As irritability decreases to moderate or low levels, you can systematically increase the challenge.
Capacity represents the maximum amount of work or load you can perform in a single, isolated effort under ideal conditions. Tolerance represents the volume, intensity, and frequency of exercise you can perform repeatedly without provoking an adverse inflammatory or painful reaction.
Many active adults make the mistake of programming their workouts based entirely on their single-session capacity. You might possess the muscular strength to perform four sets of heavy barbell squats on Monday, but your knees may remain swollen and stiff through Thursday. Sustainable programming must always be designed around your repeatable tolerance rather than your peak capacity.
You do not need to be completely pain-free to benefit from strength training. Some rehabilitation protocols deliberately introduce mild, controlled loading to rebuild tissue capacity. A simple traffic light system provides a clear, day-to-day decision-making tool:
Using this traffic light approach removes the guesswork from your training sessions. It allows you to stay physically active while protecting healing or sensitive structures from excessive irritation.
When an exercise causes joint discomfort, inexperienced trainees often abandon that movement pattern entirely. A more effective strategy is to preserve the underlying functional pattern while modifying one or more key programming variables.
Range of motion is a fully customizable training variable. If deep knee flexion hurts during a squat, you do not need to eliminate squatting from your life. You can simply squat to a higher box, perform a shallow leg press, or use a partial range of motion while your tissues adapt.
Adjusting your range of motion allows you to load the target musculature safely within a comfortable envelope of function. Over time, as your strength and connective tissue tolerance improve, you can gradually increase the depth of the movement.
Stability demand refers to the amount of whole-body balance, joint coordination, and motor control required to complete an exercise. A standing single-leg dumbbell Romanian deadlift requires immense balance and multi-joint stabilization. A seated leg curl on a machine targets the same primary muscle group with virtually zero balance demand.
When joint pain or balance impairments are present, increasing external stability is a powerful modification. You can stabilize a movement by:
Machines are not inferior to free weights. They provide external stability and predictable resistance curves, allowing you to train target muscles to a meaningful level of muscular effort without overloading sensitive joints.
Lifting weights with rapid, uncontrolled momentum introduces high peak impact forces to joint surfaces and tendon insertions. Moving too quickly makes it difficult to maintain precise alignment, especially when fatigue sets in.
Slowing down the eccentric (lowering) phase of a repetition to two or three seconds dramatically reduces peak joint stress. Adding a brief, controlled pause at the transition point eliminates ballistic bouncing and builds positional strength. Slower tempos allow you to achieve a robust muscular stimulus while using significantly lighter external loads.
You do not need to lift near-maximal weights to build muscular strength and stimulate metabolic health. Research in clinical exercise science demonstrates that muscle hypertrophy and functional strength can be achieved across a wide spectrum of loading ranges.
Instead of training to absolute muscular failure, keep several repetitions in reserve (RIR). Ending your sets when you could still complete two or three more technically sound repetitions provides an effective stimulus while protecting your joints from fatigue-induced breakdown.
Total training volume is the product of your sets, repetitions, and load across a given training week. When joints are sensitive, total volume is often the primary trigger for post-exercise symptom flares.
The World Health Organization recommends performing muscle-strengthening activities involving all major muscle groups at least two days per week. For most adults managing joint limitations, two to three focused, full-body sessions per week provide an ideal balance between tissue stimulation and systemic recovery.
Knee discomfort is one of the most common reasons adults reduce their physical activity. Whether your symptoms stem from osteoarthritis, past meniscus tears, or patellofemoral sensitivity, you can adapt your lower-body training to build leg strength safely.
The primary knee-dominant patterns include squats, leg presses, step-ups, and lunges. These movements strengthen the quadriceps, which play a direct role in absorbing ground reaction forces during walking, stair climbing, and standing up from a chair.
If standard squatting provokes knee discomfort, apply these specific modifications:
When your knees are experiencing an acute flare, you can maintain lower-body strength and metabolic output by emphasizing hip-dominant exercises. Movements like Romanian deadlifts, glute bridges, and hip thrusts place primary mechanical demands on the gluteal muscles and hamstrings while keeping knee joint movement to a minimum.
Strengthening the posterior chain provides better dynamic control of the femur during daily tasks. Strong gluteal muscles prevent excessive inward collapse of the knee (valgus movement), which reduces uneven pressure distribution across the knee joint compartment.
The shoulder is the most mobile joint in the human body, relying heavily on dynamic muscular stabilization from the rotator cuff and scapular stabilizers. Shoulder sensitivity often arises when reaching overhead, lying flat on a bench, or pressing with wide hand positions.
You do not need to stop pressing simply because standard barbell bench presses or overhead presses cause a pinch. Small adjustments to your grip width, pressing angle, and arm path can eliminate impingement-like sensations.
A balanced shoulder routine requires equal or greater attention to pulling movements. Horizontal rows strengthen the rhomboids, middle trapezius, and rear deltoids, which create a stable muscular foundation for the scapula.
To protect sensitive shoulders during pulling exercises:
Low-back sensitivity and reduced balance often occur together, particularly in adults aged 40 and older. Fear of aggravating spinal discomfort can lead to progressive inactivity, which further degrades postural stability and increases fall risk.
Axial loading occurs when an external weight compresses the spine from above, such as a heavy barbell resting across the upper back during a traditional back squat. For individuals with discogenic or facet joint sensitivity, heavy axial loading can provoke symptoms.
You can modify your training to build lower-body strength while completely eliminating heavy spinal compression:
According to data from the Centers for Disease Control and Prevention (CDC), more than 14 million older adults report falling each year. Fortunately, clinical fall-prevention programs, such as those evaluated in the CDC STEADI materials, demonstrate that targeted strength and balance interventions can reduce fall risk by up to 40%.
The World Health Organization recommends that older adults engage in varied multicomponent physical activity emphasizing functional balance and strength training on three or more days per week. Balance is a trainable motor skill that progresses systematically from supported, static postures to dynamic movements:
Never perform balance exercises on unstable surfaces like wobble boards while holding heavy weights. Standing on unstable equipment reduces the amount of force your muscles can generate and significantly increases your fall risk. Perform your heavy strength training on solid ground, and practice balance challenges separately in a secure, supported environment.
Navigating joint discomfort requires filtering out outdated fitness culture dogmas and well-intentioned but inaccurate advice.
Many adults assume that any joint discomfort experienced during exercise represents irreversible cartilage destruction or structural damage. In reality, pain is an alarm system modulated by the nervous system, not a direct damage meter.
Joint sensitivity is heavily influenced by tissue inflammation, sleep deprivation, stress levels, and muscular fatigue. Experiencing a mild, temporary increase in awareness around a joint during exercise does not mean you are causing structural harm, provided the sensation remains within the green or yellow traffic light zones.
For decades, patients were told to rest and avoid weight-bearing exercise whenever their joints ached. Modern clinical research has completely overturned this recommendation. Prolonged physical inactivity leads to muscle atrophy, reduced bone mineral density, stiffened tendons, and decreased synovial lubrication. Structured foundational movement patterns are recognized as first-line medical therapy for managing osteoarthritis symptoms.
Some functional fitness enthusiasts claim that weight machines are unnatural and inferior to free weights. This claim is incorrect for individuals managing joint limitations.
Machines provide external stabilization, lock you into fixed and predictable movement paths, and eliminate the risk of dropping weights. A selectorized machine chest press or leg press is often the safest and most effective tool for training a target muscle group when joint stability or spinal fatigue is a limiting factor.
While training through a complete range of motion is beneficial when joints are healthy, insisting on full depth during an active joint flare is unnecessary. Partial repetitions, elevated box squats, and shortened pressing ranges allow you to maintain muscular strength without irritating sensitive end-range joint structures. You can always expand your range of motion gradually as tissue tolerance improves.
Implementing an adaptable strength training program requires a systematic, step-by-step approach. Follow these clear guidelines to build a safe, sustainable routine tailored to your body.
These adaptable templates are designed to be performed twice per week on non-consecutive days. Each session focuses on major movement patterns while prioritizing joint-friendly execution.
This template is ideal for beginners, deconditioned adults, or anyone recovering from a recent period of joint sensitivity.
This template adapts upper-body training for individuals managing sensitive shoulders, wrists, or elbows.
This template adapts lower-body training for individuals managing knee or hip osteoarthritis.
Progressing your strength training does not mean you must add weight to the bar every week. When managing joint limitations, prioritize other progression strategies before increasing external load:
To ensure your body adapts smoothly, integrate adequate systemic recovery and sleep between your training exposures. Recovery is when tissues remodel and repair.
Resistance training is safe and therapeutic for most individuals, but it does not replace individualized medical diagnosis or clinical rehabilitation. Knowing when to consult a qualified physical therapist, orthopedic physician, or primary care provider is essential.
According to pre-participation screening guidance from the American College of Sports Medicine (ACSM), your need for formal medical clearance depends on your current physical activity level, the presence of known cardiovascular, metabolic, or renal disease, and whether you experience symptoms suggestive of those conditions.
You should seek medical clearance before beginning or progressing a resistance training program if you experience:
If you encounter any of the following joint-specific warning signs, discontinue exercise and schedule a clinical evaluation immediately:
Strength training programming is an adaptable conditioning process, not a medical prescription. Collaborating with a physical therapist allows you to receive specific manual diagnostics and individualized exercise modifications tailored to your medical history.
Understanding key scientific terms helps you make sense of training guidance and communicate effectively with health professionals.
Mechanotransduction is the physiological process through which biological cells sense mechanical forces and convert them into intracellular biochemical responses. In muscles, tendons, and cartilage, mechanical tension stimulates cell surface receptors, activating protein synthesis pathways that rebuild and strengthen connective tissue structures.
Tissue irritability is a clinical concept used to describe how easily pain or inflammatory symptoms are triggered by movement, how severe those symptoms become, and how long they take to return to baseline. Categorizing a joint as having low, moderate, or high irritability allows coaches and clinicians to prescribe appropriate exercise ranges, loads, and rest intervals.
Repetitions in reserve is a subjective measure of training intensity that estimates how many additional, technically sound repetitions you could have completed before reaching muscular failure. Leaving two to three repetitions in reserve ensures that you stimulate muscle adaptation without imposing excessive fatigue or mechanical strain on your joints.
Building a safe and sustainable strength training routine is entirely achievable when you follow an evidence-based roadmap. Focus on small, consistent actions that align with your current tolerance.
Revisit this resource whenever you experience a joint flare, introduce a new movement pattern, or need to adapt your strength routine following a change in your physical capacity.
By prioritizing stable mechanics, customizable ranges of motion, and consistent symptom monitoring, you can build lifelong muscular strength while keeping your joints comfortable and resilient.
WeightRestart shares research-led guidance on weight loss, metabolism, nutrition, strength, appetite, sleep and recovery. Our goal is to make complex health information clear, practical and useful for people building progress they can maintain.



Learn how to build a weight-management approach around better information, realistic expectations and habits you can keep using.
read the blog